Try-On
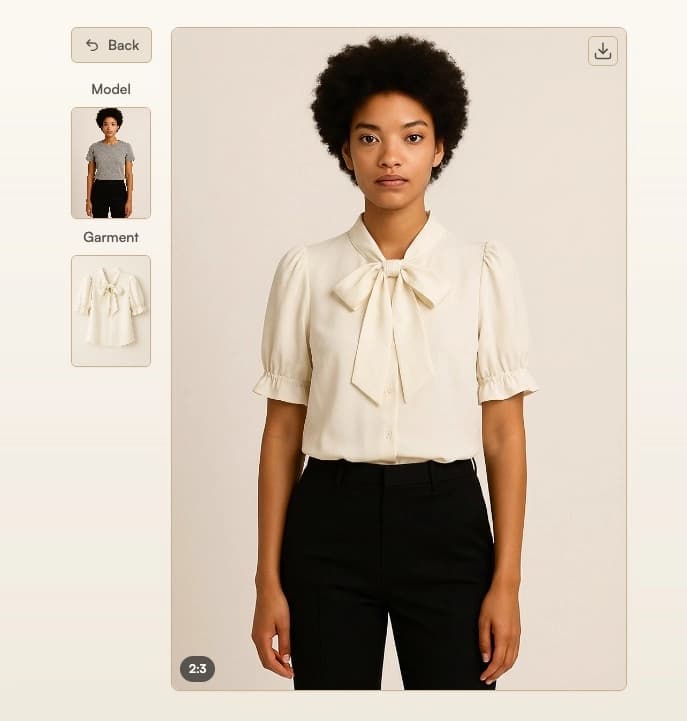
Transfer clothing and other wearable items from one photo to another. Try-On preserves product details, texture, and fit while matching the target model's pose and body shape.
What is Try-On?
Virtual try-on shows how a specific item looks on a specific person. Unlike Product to Model, which generates a new AI fashion model to showcase the product, Try-On keeps your chosen model, pose, and body shape while swapping in the garment or accessory.
When to Use
Use Try-On when you want to place a product on an existing model photo while keeping that person's identity, pose, and background. It works with tops, bottoms, dresses, outerwear, shoes, hats, scarves, and other wearable fashion items.
- Want a new AI-generated model rather than using an existing model image? Use Product to Model.
- Already have the product on a person and only want to change who it is? Use Model Swap.
- Want a clean catalog packshot of the garment alone, without the model? Use Packshot.
How to Use It
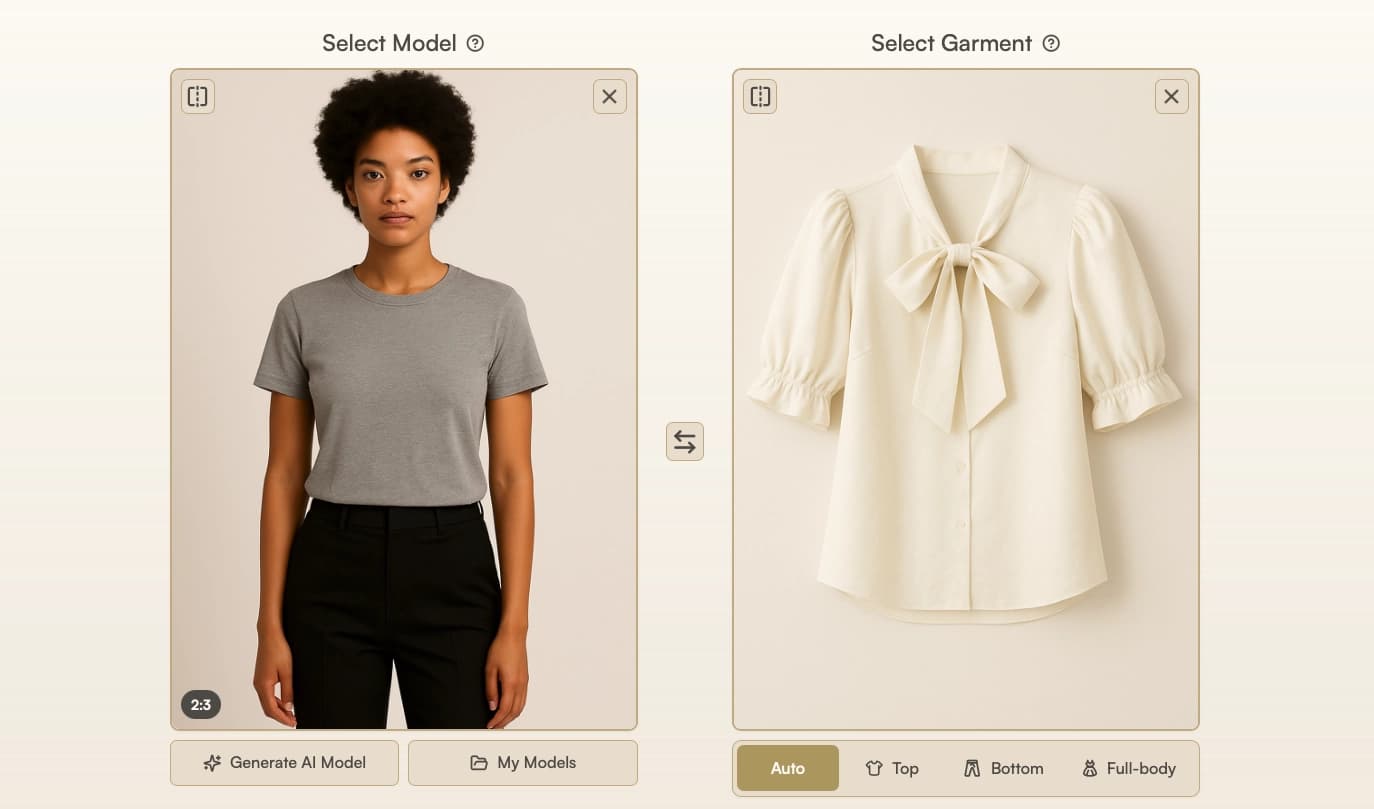
Choose or Upload a Model Image
Upload a photo of the person who should wear the item, or pick one from the Starter Models gallery.
Upload the Product Image
Upload the product you want to try on. On-model, flat-lay, and ghost mannequin photos are all supported.
Adjust Settings (Optional)
- Prompt: add instructions to guide the generation, such as "open jacket", "tucked shirt", or other styling details. If the product image contains multiple items (for example, a top and bottom) and you want to transfer only one, specify the item in the prompt.
- Number of Images (1-4): generate multiple variations in a single run.
Run the Try-On
Click Run to start. Once the generation completes, browse through your results using the navigation arrows or thumbnails.
Prepare for Export or Continue Editing
- Download, upscale, or use Export for Web in Gallery
- Fix mistakes, adjust background, or change aspect ratio with Edit and Reframe
- Create a short video from this image with Image to Video
Parameters
Only the model image and product image are required. Other inputs are optional.
| Parameter | Description |
|---|---|
| Model image | The person who will wear the item. Upload your own photo or pick from the Starter Models gallery. See Best Practices for Model Image. |
| Product image | The wearable item to apply. On-model, flat-lay, and ghost mannequin photos are supported. See Best Practices for Product Images. |
| Prompt | (Optional) Add instructions to guide the generation. For example: "open jacket", "tucked shirt", "rolled up sleeves". |
| Resolution | Auto (default), 1K, 2K, 4K. Auto matches output to your input image resolution. See Resolution & Generation Mode. |
| Generation Mode | Auto (default), Balanced, Quality. Auto selects the optimal mode for your input. See Resolution & Generation Mode. |
| Number of Images | (1-4) Generate multiple variations in a single run. |
Starter Models
Click the Models button in the model upload area to open the Starter Models gallery. Browse 70+ curated model photos across a range of appearances, body types, and backgrounds.
Use the tabs to filter by Women or Men, and narrow by age group: Adult, Teen, Kid, Toddler, or Senior. Click any model to select it.

Starter Models are available on all plans at no extra cost.
Best Practices for Model Image
Recommended:
- Use a 2:3 aspect ratio for balanced framing.
- Ensure the full outfit is visible and not cropped.
- Choose fitted clothing so the system can detect edges and body shape.
- Use three-quarter or full-body shots for best alignment.
- Keep the pose natural, such as standing or slightly angled.
Avoid:
- Extreme poses or unusual perspectives.
- Photos with multiple people or children.
- Hair or objects covering the clothes.
- Wide aspect ratios or distant shots.
Best Practices for Product Images
Recommended:
- On-model photos deliver the best results, as garments appear in their natural shape and lighting.
- Ghost mannequin shots are a good alternative when model photos are unavailable, as they preserve the garment's shape and proportions.
Acceptable but less optimal:
- Flat-lay images can work, but the lack of depth may reduce realism, especially for structured items like shoes or bags.
Avoid:
- Apparel on hangers: introduces distortion and loses shape context.
- Apparel on the floor: wrinkles and uneven draping reduce output quality.
Troubleshooting
- Original clothing is not being removed correctly → add a specific instruction to remove the unwanted item (e.g., "remove the jacket").
- Product details are not transferring accurately → use a higher quality source image with clear outlines and good lighting. On-model photos typically produce the best results.
- Results don't match expected styling → add instructions in the prompt field (e.g., "tucked shirt", "open jacket").
Where Next?
After generating, the post-result suggestion bar offers quick access to related tools:
- Increase resolution with Upscale
- Fit marketplace or social aspect ratios with Reframe
- Create motion clips with Image to Video